Are you still sending email blasts to all of your customers at the same time?
If so, you’re missing out on the benefits of marketing automation. Imagine sending a customer that abandons their cart a special offer for that same product 20 minutes later, or even retargeting that customer using a Facebook custom audience. The best part is: It can all be automatic!
These automated processes can make a big difference when it comes to increasing both top-line revenue and bottom-line profitability for your ecommerce business.
In this post, we will take a look at why Drip is an excellent choice for marketing automation and how to get set up if you’re using Magento.
Why Should You Use Drip?
You have probably heard the term marketing automation, but what does it really mean?
Marketing automation boils down to two concepts:
- Personalization – Emails contain relevant product recommendations based on the customer’s own purchasing behavior and other actions.
- Automated workflows – Emails are triggered to send based on events rather than being manually and/or arbitrarily sent out.
Drip is a lightweight solution that works great for ecommerce businesses of all sizes. Using the platform, you can setup personalized and automated campaigns for abandoned carts, birthday specials, and other events to reach, win-back, and upsell customers.
You can even integrate with your existing Facebook ads and numerous other services, to create comprehensive retargeting campaigns that ensure your products are in front of customers at the right time and place to encourage a purchase. Furthermore, you can effortlessly save Facebook ads, which can enable you to analyze and optimize your retargeting campaigns with ease.
Ready to get started?
How to Integrate with Magento
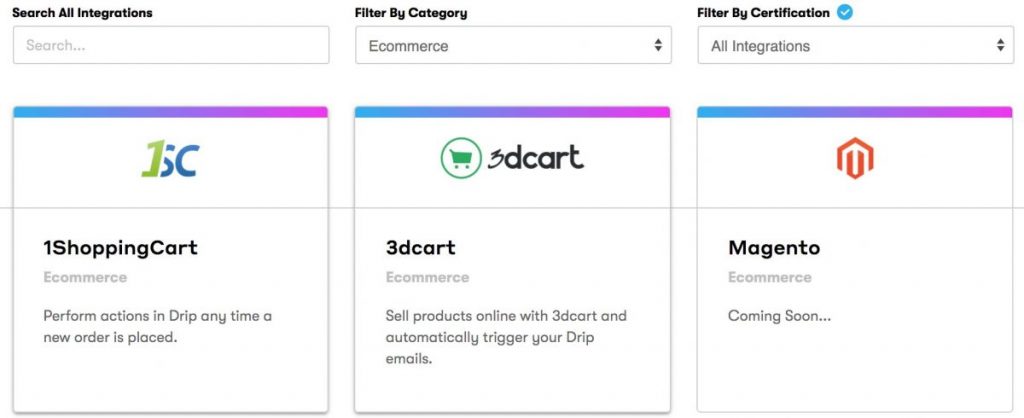
Drip has native integrations for many different ecommerce products – but unfortunately, not Magento. This means that you will have to go through a few more hoops than you would if you were integrating Drip with Shopify, 3dcart, or other platforms.

But, don’t worry, Drip still works with Magento and full integration is coming soon…
Connecting with Drip
The first step after signing up for Drip is connecting it with your Magento installation, importing your contacts, and setting up any third-party integrations, such as payment processors.
- Setup Zapier – Drip will eventually have a pre-built integration with Magento, but for now, Zapier is the best option to automate the process of adding new customers to Drip without having to import them each time. After setting up a Zapier account, enable the Magento to Drip Zap to automate the process.
- JavaScript Snippet – Drip uses a JavaScript tracking snippet that you receive when initially setting up your account to track users on your website. It’s a good idea to put this code in the footer of your theme to ensure that everything else on the page loads beforehand, maintaining a smooth user experience.
- Import Contacts – The easiest way to import your contacts is to upload a CSV file that contains their information into Drip. You can export this data from Magento by clicking on System in the left menu and then clicking on Export under Data Transfer. The Entity Type should be set to Customers Main File and the Export File Format should be set to CSV. You can then select all of the fields that you’d like to import to Drip. In addition, you can import your other marketing lists from third-party email platforms.
- Import Email Templates – You may have existing email templates in MailChimp or AWeber that you’d like to use in Drip. The process depends on the email provider that you’re using, but the Drip Onboarding Guide has a great video tutorial that shows you how to import these templates. Of course, you can also build new templates within Drip if you don’t have any or are in need of a refresh anyway.
- Integrate – You can integrate Drip with other third-party platforms that you may be using to access that data. In particular, payment processors like Authorize.net and Stripe give you access to order-related triggers, such as a Made a purchase trigger. There is some configuration involved with setting these up, which depends on the payment processor, but Drip provides excellent documentation on its Integrations page.
Create Workflows & Campaigns
Congratulations, you’re setup and ready to start realizing the benefits of marketing automation!
The next step is creating a workflow and campaigns that fit within that workflow. For example, you may want to create one campaign that offers new customers a discount on their next order, which can be triggered by a workflow that looks for a contact that hasn’t been tagged as a “customer” that has made their first purchase.
- Create a Campaign – Campaigns are a great way to send a series of emails at specific intervals. You can create a campaign by clicking on Campaigns and selecting New Campaign and then following the step by step guide. You quickly and easily can create campaigns for things like new customer outreach or seasonal sales.
- Setup Workflows – Workflows are designed to build marketing funnels in Drip, and they can be as simple or complex as you want them. There are several pre-built workflows, or you can build your own custom workflows. You can create workflows by going to Automation > Workflows > New Workflow.

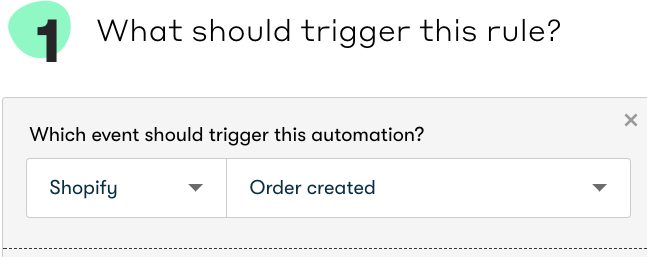
Unfortunately, you don’t have as many built-in options when using Magento as you do with Shopify or other integrated ecommerce platforms. For example, you won’t have access to a Checkout created via Shopify trigger that lets you easily set up abandoned cart campaigns.
Drip does have an open API that can be used to build tighter integration, but using this API is beyond the scope of this article. The good news is that they are working on an integration now! In the meantime, you can use the built-in triggers to create a variety of unique workflows.
3 Drip Workflow Ideas
You may not be able to leverage tight integrations or shareable workflows to the extent of Shopify users (yet!), but you can get started with some other valuable workflows. Some of these are available as Shareable Workflows on Drip’s website, which makes them easy to setup without having to manually create the workflow from scratch.
Retargeting
The retargeting workflow kicks off with a Page visit that’s tied to a specific marketing campaign (e.g. www.mysite.com/sale-today). After a one day wait, if no purchase has been made (based on the Made a purchase trigger), you can add them to a Facebook custom audience and start showing them Facebook ads advertising the product. If they still haven’t made a purchase after another day or week, you can then send them another follow-up marketing campaign.
Win-Back
The win-back workflow doesn’t start with a trigger, but rather, uses a bulk operation to run on all relevant users. Start by storing your customers’ last purchase in a custom field and then tag them depending on the amount of time that has elapsed (e.g. 365 days, 90 days, etc.). You can then create a workflow that looks at the tag and ensures that they haven’t placed an order since, in which case they will be sent a reengagement email.
Birthday
The birthday workflow may be triggered by a customer’s birthday or anniversary of their initial order or sign-up. After creating a custom field for the date, you can compare the date to the current date on a regular basis and reset the custom field when the date passes. You can then create a workflow that uses the custom field change as a trigger to send a one-off email that might contain a special offer or other details.
The Bottom Line
Drip enables ecommerce businesses to significantly improve their revenue and profitability by personalizing messaging and investing in easy to use email outreach tools. While Drip doesn’t offer a pre-built integration with Magento at this time, you can still access the many built-in triggers to create valuable workflows.
Shameless plug: The best marketing campaigns are meaningless if your e-commerce website is constantly down. If you’re looking for ecommerce hosting, checkout EuroVPS. We offer a hands-off solution that lets you focus on building a great business, rather than troubleshooting performance issues to deal with potential security holes.


